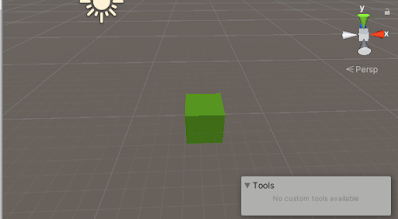
Positioning GameObjects in unity editor
You can change transform component of any gameobjects by manipulating mouse on any Gizmo axis or you can change values of transform component in inspector window.
transform has the following tools. let's take a look
Move tool
You can select move tool in toolbar or can select by pressing hotkey W.
At the center of Move Gizmo there are three small squares by dragging these square you can move gameObject along a plane and third axis remains constant.
if you press shift key while dragging Move Gizmo squares will change to flat square. This flat square indicates that you can move gameObject in the direction scene view camera is facing.
For moving to particular axis just drag any one of the axis that you want to change.
Rotation tool
While you select rotate tool or press hotkey E you will see spheres around gameObject and you can change rotation by dragging this sphere Gizmo.As with the Move Gizmo, the last axis you changed will be colored yellow. Think of the red, green and blue circles as performing rotation around the red, green and blue axes that appear in the Move mode (red is the x-axis, green in the y-axis, and blue is the z-axis). Finally, use the outermost circle to rotate the GameObject around the Scene view z-axis. Think of this as rotating in screen space.
Scale tool
Select scale tool or press hotkey R. Scale tool allow you to scale a gameObject in which axis you want to scale just drag. But you should take care about child game object because if you select parent object then it will scale whole parent as well as it all child gameObject and you select only child gameObject the it only scale child object so take care of it.
Rect Transform Tool
For positioning 2D sprites or UI elements Rect transform is commonly used but it is also used for manipulating 3D objects. It contains scaling, rotation, and moving in a single Gizmo. You can access it by pressing key T.
- click and drag within rectangular Gizmo to move gameObjects.
- For scaling GameObject click and drag any corner or edge of rectangle.
- drag an edge scale scale gameObject along one axis.
- drag a corner will scale a gameObject along two axis.
- position the cursor just beyond the a corner of rectangle for rotating gameObject. Cursor changes to display rotating icon. Click and drag from this area to rotate gameObject.
Transform Tool
You can move, rotate, and scale `gameObjects by selecting transform tool in a single Gizmo. You can select transform by pressing key Y.
Custom tool
if your project use custom editor tool, some of also allow you to position gameObjects.
You can access custom tool by right clicking on it.
Gizmo handle position togglesGizmo handle tool is used to define the location of any transform tool Gizmo and handles use to manipulate the Gizmo itself.
For Position
You can toggle between Pivot/center mode by clicking on it.
if you choose pivot mode it will position the Gizmo to actual pivot point defined by Transform component.
if you choose center mode then it will place Gizmo to the center of selected gameObject.
For Rotation
You can toggle between Local and Global by clicking Local/Global button.
Local keeps the Gizmo's rotation relative to GameObject's
Global clamps the Gizmo to world space orientation.
Snapping
Unity provide three type of snapping
World Grid Snapping
snap a GameObject to a grid projected along the X, Y, or Z axes or transform a GameObject in increments along the X, Y, or Z axes. This is only available while using the World, or Global, handle orientation.
Surface Snapping
While dragging in the center using the Move tool, hold Shift and Control (Command on Mac) to quickly snap the GameObject to the intersection of any Collider.
Vertex Snapping
Use vertex snapping to quickly assemble your Scenes: take any vertex from a given Mesh and place that vertex in the same position as any vertex from any other Mesh you choose. For example, use vertex snapping to align road sections precisely in a racing game, or to position power-up items at the vertices of a Mesh.
Follow the steps below to use vertex snapping:
- Select the Mesh you want to manipulate and make sure the Move tool is active.
- Press and hold the V key to activate the vertex snapping mode.
- Move your cursor over the vertex on your Mesh that you want to use as the pivot point.
- Hold down the left mouse button once your cursor is over the vertex you want and drag your Mesh next to any other vertex on another Mesh.
- To snap a vertex to a surface on another Mesh, add and hold down the Shift+Ctrl (Windows) or Shift+Command (macOS) key while you move over the surface you want to snap to.
- To snap the pivot to a vertex on another Mesh, add and hold the Ctrl (Windows) or Command (macOS) key while you move the cursor to the vertex you want to snap to.
- Release the mouse button and the V key when you are happy with the results (Shift+V acts as a toggle of this functionality).
Look-at rotation
While using the Rotate tool, hold Shift and Control (Command on Mac) to rotate the GameObject towards a point on the surface of any Collider.
Screen Space Transform
While using the Transform tool, hold down the Shift key to enable Screen Space mode. This mode allows you to move, rotate and scale GameObjects as they appear on the screen, rather than in the Scene.


